Thinking about installing solar panels at your home? Great choice! Not only can you save a lot of money on your electricity bills, but you’re also taking a big step towards a greener, more eco-friendly future. 🌎☀️
Now, we get it — installing solar panels sounds complicated. But honestly, once you break it down, it’s much easier than you might think! Especially when you have the right people and equipment to help you. Let’s walk you through everything you need to know.
Why Hire Professionals for Solar Panel Installation?
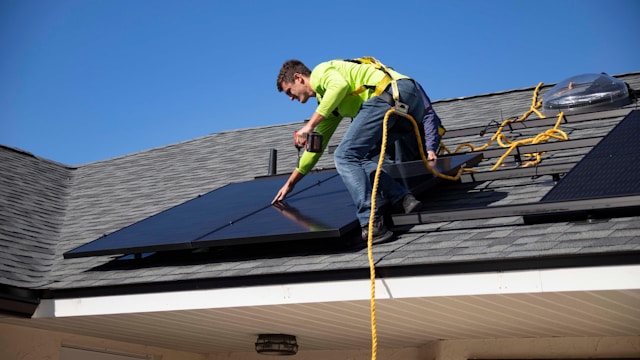
While it’s tempting to DIY your solar setup, it’s always safer (and smarter) to hire licensed professionals. They understand how to handle the photovoltaic structure and ensure everything is set up correctly. Plus, you’ll avoid any costly mistakes or safety hazards.
What You’ll Need for a Rooftop Solar System
Before getting started, here’s a handy checklist of all the components you’ll need for your home solar setup:
- Solar panels (obviously! 🌞)
- Inverter
- Solar mounting structure
- Lightning arrester
- DC cables and combiner box
- Conduit pipes and cable trays (to guide the cables neatly)
- AC cables
- Earthing cables and kits
- Electrical connectors
- MC4 connectors
- Batteries (optional, but great for energy storage!)
Having the right gear will make the whole process smoother and safer.
Choosing the Right Spot, Angle, and Direction for Your Panels
When it comes to placing your panels, here’s the golden rule: Avoid shade! 🌳🛑
Your panels need maximum sunlight between 9 AM and 4 PM to work efficiently.
Since spotting shady areas with just your eyes can be tricky, many installers use special software to do a “shadow analysis” before starting. Pro tip: In India, most experts recommend facing your panels south for the best exposure.
Step-by-Step: How to Install Solar Panels at Home
Even if you’re hiring professionals, it’s good to know what goes into the installation process:
1. Choose the Type of Mount
You’ll need one of three types:
- Pole mounts (single panels)
- Roof-ground mounts (multiple panels at an angle)
- Flush mounts (fixed to a flat surface)
The type you pick depends on your roof space and the number of panels you want.
2. Inspect Your Roof
Make sure your roof is clean, durable, and mostly shadow-free. A strong, flat surface = a solid solar setup!
3. Plan the Conduit
Lay the conduit (pipes that house the wiring) across the roof before mounting the panels. Good planning now saves a lot of trouble later!
4. Build the Platform
This is where your panels will sit securely. A sturdy platform helps them handle strong winds and weather.
5. Organize the Panels
Lay out the panels first without fixing them permanently. This helps you visualize the setup and figure out how many panels you’ll fit per row.
6. Electrical Wiring
This is the heart of the system! 🧡 Here’s how the basic connections work:
- Connect the solar panels to the inverter: Positive to positive, negative to negative.
- Connect the inverter to the battery: Again, positive to positive, negative to negative.
- Connect the inverter to your home’s electrical board: So your house can actually use the solar power!
Important: Make sure everything is switched OFF during installation to stay safe.
7. Final Inspection
Check everything — from wiring to mounts — to make sure there are no loose ends or water leaks. A final inspection now can prevent bigger problems later.
8. Activate Your Solar System
Switch it on and enjoy free, clean energy! 🌞✨ If anything doesn’t seem right, double-check the wiring or call your installer.
Safety First! ⚡
Here are a few must-follow safety tips:
- Wear protective gear: Gloves, helmets, safety glasses, and harnesses are a must.
- Use the right tools: Ladders, scaffolding, ropes, and good-quality power tools.
- Always turn off power: Before starting any installation work.
- Secure everything tightly: Especially the mounts and panels to withstand bad weather.
And again — if you’re not fully confident, let a pro handle it. It’s safer, faster, and often saves money in the long run.
Final Thoughts
Installing solar panels at home is a smart move. Yes, the upfront costs can be a bit high, but think of it as an investment — your future self (and your electricity bill) will thank you! 💰🌱
Just remember: Proper installation is key. With the right setup and maintenance, your solar panels can keep your home bright and your wallet happy for decades.
FAQs About Home Solar Panel Installation
Can I install solar panels myself?
If you’re experienced with electrical work, it’s possible. But for most people, hiring a professional is much safer and more reliable.
Will installing solar panels save me money?
Absolutely! While the initial investment is high, you’ll see huge savings over time as your electricity bills drop.
How many solar panels do I need?
It depends on your home’s energy usage and roof size. Your installer can help you calculate the exact number.
How much does a solar panel setup cost?
Costs vary depending on the size of the system, the brand of equipment, and labor charges. Always get multiple quotes to compare.
How long does installation take?
Typically, a residential installation takes 1–3 days, depending on the complexity of the system and roof.
Would you like me to also create a shorter, social media version of this for you? 📱🚀
(Like a 1-minute read or carousel post!)